Drying and Preserving Herbs Guide
Drying and preserving herbs guide for retaining all the flavors. Drying and preserving herbs is a time-honored practice that allows you to enjoy the flavors and aromas of fresh herbs throughout the year even if the herbs are not in their growing season.
Drying and Preserving Herbs Guide
Whether you grow your own herbs or purchase them from a local market, learning how to properly dry and preserve them ensures that you have a stash of flavorful ingredients at your fingertips.
In this post, I will explore the techniques and tips that I have used over the years for drying and preserving herbs effectively. I grow many herbs and you can check this post on the herbs that grow well together.
Selecting and Harvesting Herbs For Drying
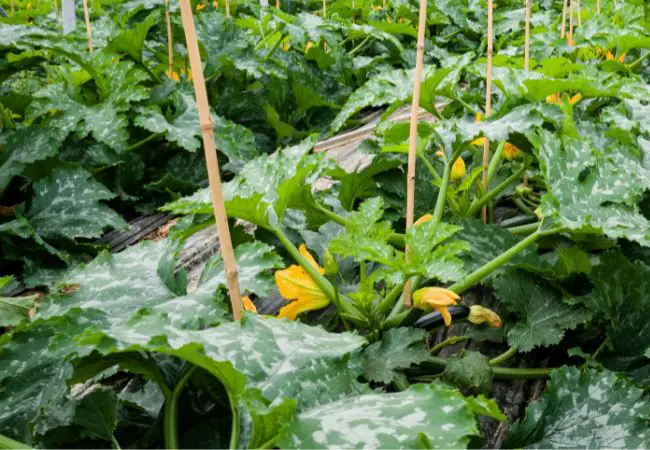
To achieve the best results, it is crucial to select the right herbs for drying and harvest them at the optimal time. Certain herbs lend themselves better to drying than others, so choose herbs like rosemary, thyme, oregano, sage, mint, and lavender.
Harvest herbs in the morning when their essential oils are at their peak and before the heat of the day causes them to wilt. Use sharp scissors or pruning shears to cut the herbs just above a set of healthy leaves.
Preparing Herbs for Drying
Before drying your herbs, give them a gentle wash to remove any dirt or debris. Pat them dry with a clean towel or allow them to air dry for a short period to remove excess moisture.
Next, remove any damaged or discolored leaves and discard any woody stems or thick stalks. By preparing your herbs properly, you ensure that only the best quality leaves are preserved.
Best Herb Drying Methods
There are various methods for drying herbs, each with its advantages. The four most common methods are air drying, oven drying, air fryer, and using a dehydrator.
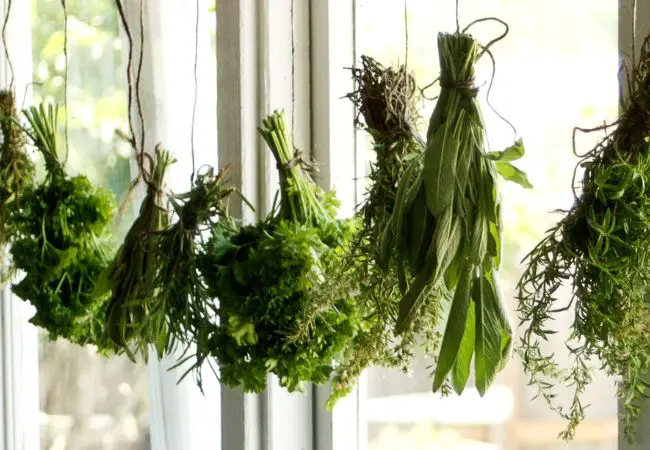
How to Air Dry Herbs
Air-drying herbs is the oldest method. Bundle small bunches of herbs together, tying them with twine or a rubber band.
Hang the herb bundles upside down in a warm, well-ventilated area away from direct sunlight.
Check regularly for dryness, which usually takes around one to two weeks, depending on the herb and environmental conditions.
How to Oven Dry Herbs
Preheat your oven to between 1000 F and 1800 F.
Spread the herbs on a baking sheet in a single layer.
Place the baking sheet in the oven and prop the oven door open slightly to allow moisture to escape.
Check frequently and remove the herbs once they are completely dry, typically within one to three hours.
How to Dry Herbs Using a Dehydrator
Set the dehydrator to a low temperature (around 95°F to 115°F or 35°C to 46°C).
Arrange the herbs on the dehydrator trays, making sure they are not overlapping.
Leave the herbs to dry for several hours to a few days, depending on the herb and dehydrator model.
How to Use an Air Fryer to Dry Herbs
Preheat the air fryer: Set your air fryer to the lowest temperature setting, typically around 100°F to 120°F (37°C to 49°C). Preheating helps create the ideal drying environment.
Prepare the herbs: Wash and gently pat dry the herbs to remove any dirt or moisture. Remove any damaged or discolored leaves and discard thick stems.
Arrange the herbs: Place the herbs in a single layer on the air fryer rack or tray. Make sure the herbs are evenly spaced to allow air circulation.
Dry the herbs: Insert the rack or tray into the air fryer and let the herbs dry for about 1 to 2 hours, depending on the herb and desired level of dryness. Check the herbs periodically to avoid over-drying.
How To Dry Herbs in a Microwave
Drying herbs in the microwave is the quickest of the drying methods. However, it doesn’t work for all types of herbs.
Additionally, you have to be very cautious to avoid ruining the herbs. After cleaning the herbs, place them in a single layer between two paper towels.
Microwave them for 1 minute. For most herbs, you have to keep checking for dryness every 20 seconds.
Once you are satisfied with their dryness, remove them and replace them with a new bunch.
Be extra cautious with microwaving herbs because while some woody herbs (rosemary, oregano, and thyme) can hold up in the microwave, delicate herbs (parsley and basil) will wither and turn brown.
Storage and Preservation of Dried Herbs
Proper storage ensures that your dried herbs maintain their flavor and potency for an extended period. Follow these steps for optimal preservation.
Herb Preparation Before Storage:
Remove any remaining stems or seeds to ensure a smoother texture and consistent flavor.
Crumble or grind dried herbs into smaller pieces to enhance their flavor when used.
Choosing Herb Storage Containers
Use airtight containers, such as glass jars or metal tins, to keep moisture and air out.
Choose containers that are appropriately sized for the amount of herbs you have.
Proper Herb Storage Conditions
Store dried herbs in a cool, dark, and dry place, away from direct sunlight, heat sources, and humidity.
Avoid storing herbs in the refrigerator, as the moisture can deteriorate their quality.
Labeling and Organizing Dried Herbs.
Label each container with the name of the herb and the date of drying to keep track of their freshness.
Organize your dried herbs in a systematic manner, grouping them by type or purpose for easy access when cooking or making herbal remedies.
Utilizing Dried Herbs
Dried herbs offer a convenient way to enhance the flavors of your culinary creations and create homemade herbal remedies. Here are some of the ways I make the most of my dried herb collection:
Culinary Uses
Cooking and Seasoning: Add dried herbs to your favorite recipes, such as soups, stews, sauces, marinades, and salad dressings, to infuse them with rich flavors.
Infusing Oils and Vinegar: Create herb-infused oils and vinegar by adding dried herbs to a bottle and covering them with neutral oil or vinegar. Allow the flavors to meld for a few weeks before using them in dressings, marinades, or as a finishing touch on dishes.
Making Herbal Teas and Tisanes: Blend dried herbs to create aromatic herbal teas that promote relaxation, aid digestion, or provide other health benefits.
Herbal Remedies and Beauty Products:
Creating Herbal Remedies: Use dried herbs to prepare tinctures, salves, balms, or herbal sachets for various purposes like soothing minor skin irritations, supporting sleep, or boosting the immune system. Follow trusted recipes or consult herbalist resources for guidance.
Crafting Homemade Skincare Products: Incorporate dried herbs into DIY skincare products such as face masks, bath salts, or infused oils for a natural and personalized beauty regimen.
Tips for Optimal Herb Drying and Preservation
To ensure I get the best results when drying and preserving herbs, I keep the following tips in mind:
Choosing the Right Herbs for Drying: Select herbs that have a robust flavor and aroma, as they tend to retain their qualities well after drying.
Harvesting Herbs at the Correct Time: Harvest herbs in the morning when their essential oils are most concentrated, and before the heat of the day causes them to wilt.
Avoiding Exposure to Moisture and Heat: Properly dry herbs in a well-ventilated area away from moisture and direct sunlight to prevent mold or degradation of their flavor.
Monitoring and Adjusting Drying Conditions: Regularly check the progress of drying herbs and adjust drying times, temperatures, or methods as needed to ensure thorough drying.
Using Dried Herbs Within Their Shelf Life: Dried herbs have a shelf life of about one to three years. To enjoy optimal flavor and potency, aim to use them within this timeframe.
Final Thoughts On Drying Herbs
Drying and preserving herbs is a rewarding and practical way to have a year-round supply of flavorful ingredients at your disposal.
By following the proper techniques and storage methods outlined in this article, you can ensure that your dried herbs maintain their freshness, flavor, and aroma for an extended period.
Embrace the versatility of dried herbs by incorporating them into your culinary creations and exploring their potential in homemade remedies and beauty products.
I hope this post on drying and preserving herbs guide helps you savor the taste of your garden or local market herbs throughout the seasons. Please remember to follow me on Multigardening Pinterest for more awesome gardening pins.